Initiate a full multitenant device upgrade in MSSP portal
When you initiate a full upgrade, you must select packages, upload them to the selected devices, conduct readiness checks, and complete the upgrade process without a break.
Use this procedure to initiate a full upgrade.
Procedure
Step 1 | Choose . | ||
Step 2 | Click Begin an Upgrade and select FTD Upgrade or ASA Upgrade from the drop-down list. 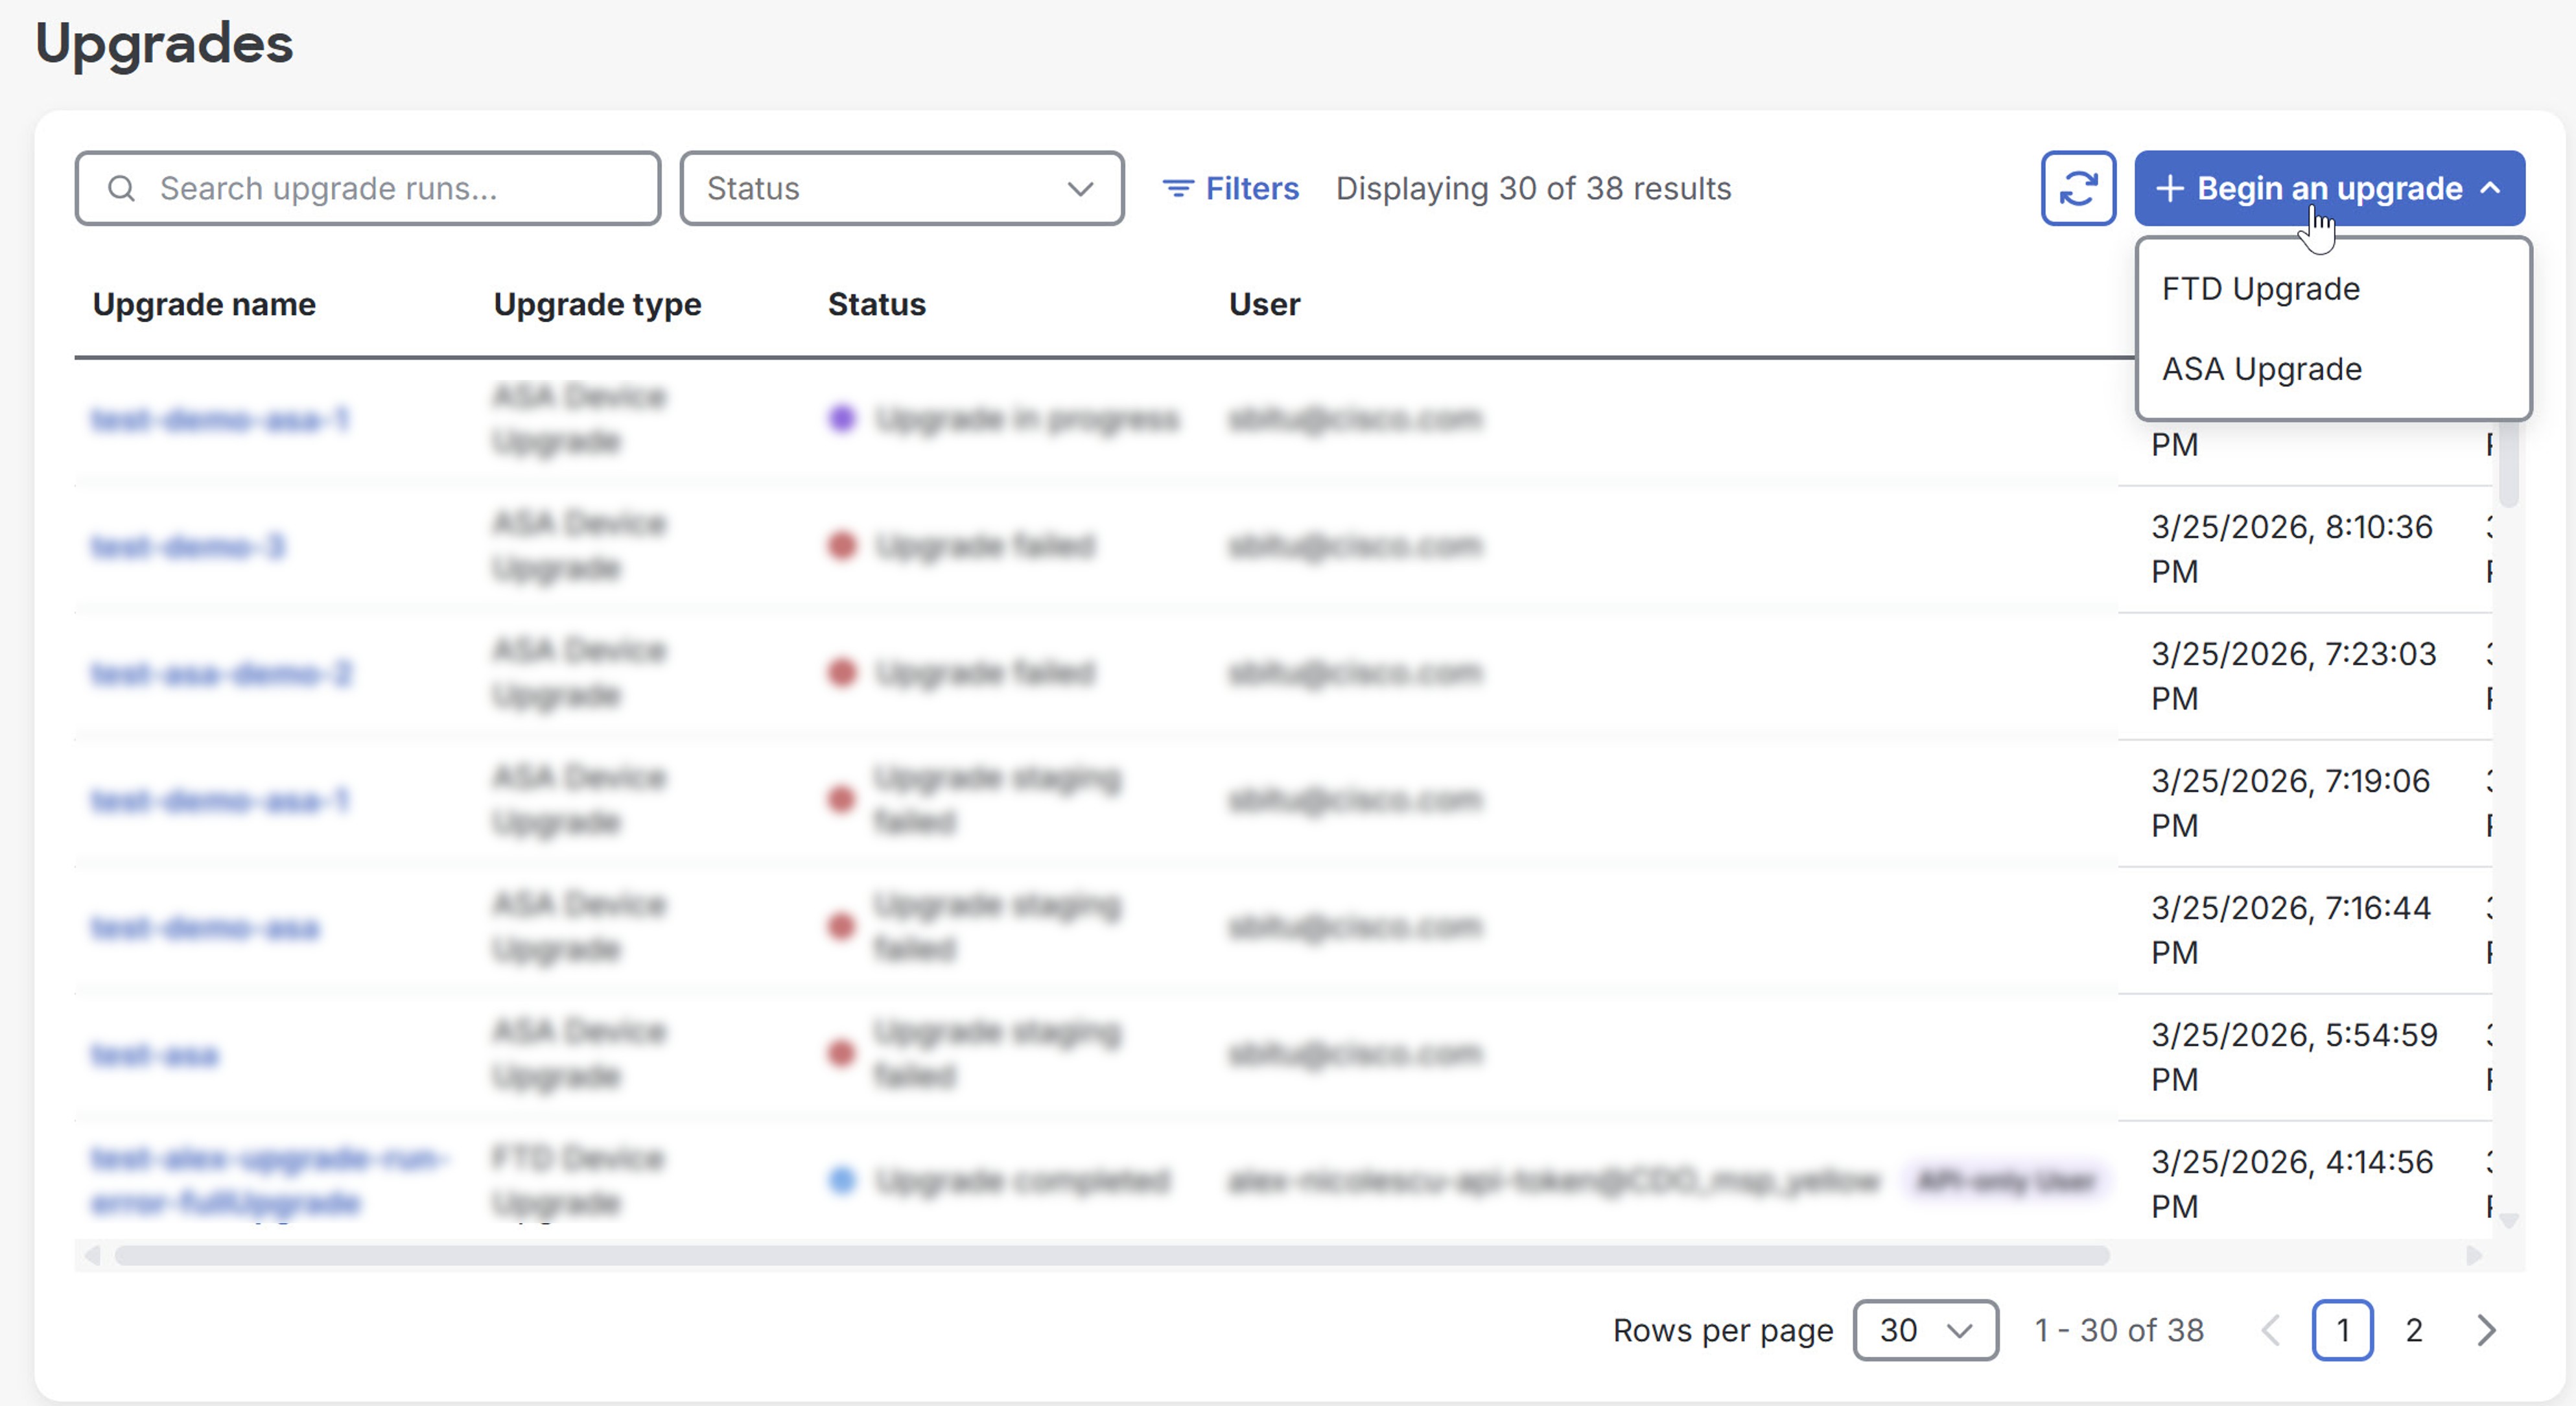 | ||
Step 3 | Enter a name for your upgrade under Job/Update name, select the devices you want to upgrade, and click Next. Filter the devices using the Model or Tenant drop-down list at the top of the Device Upgrades page. For ASA devices, you can also filter by software version.
| ||
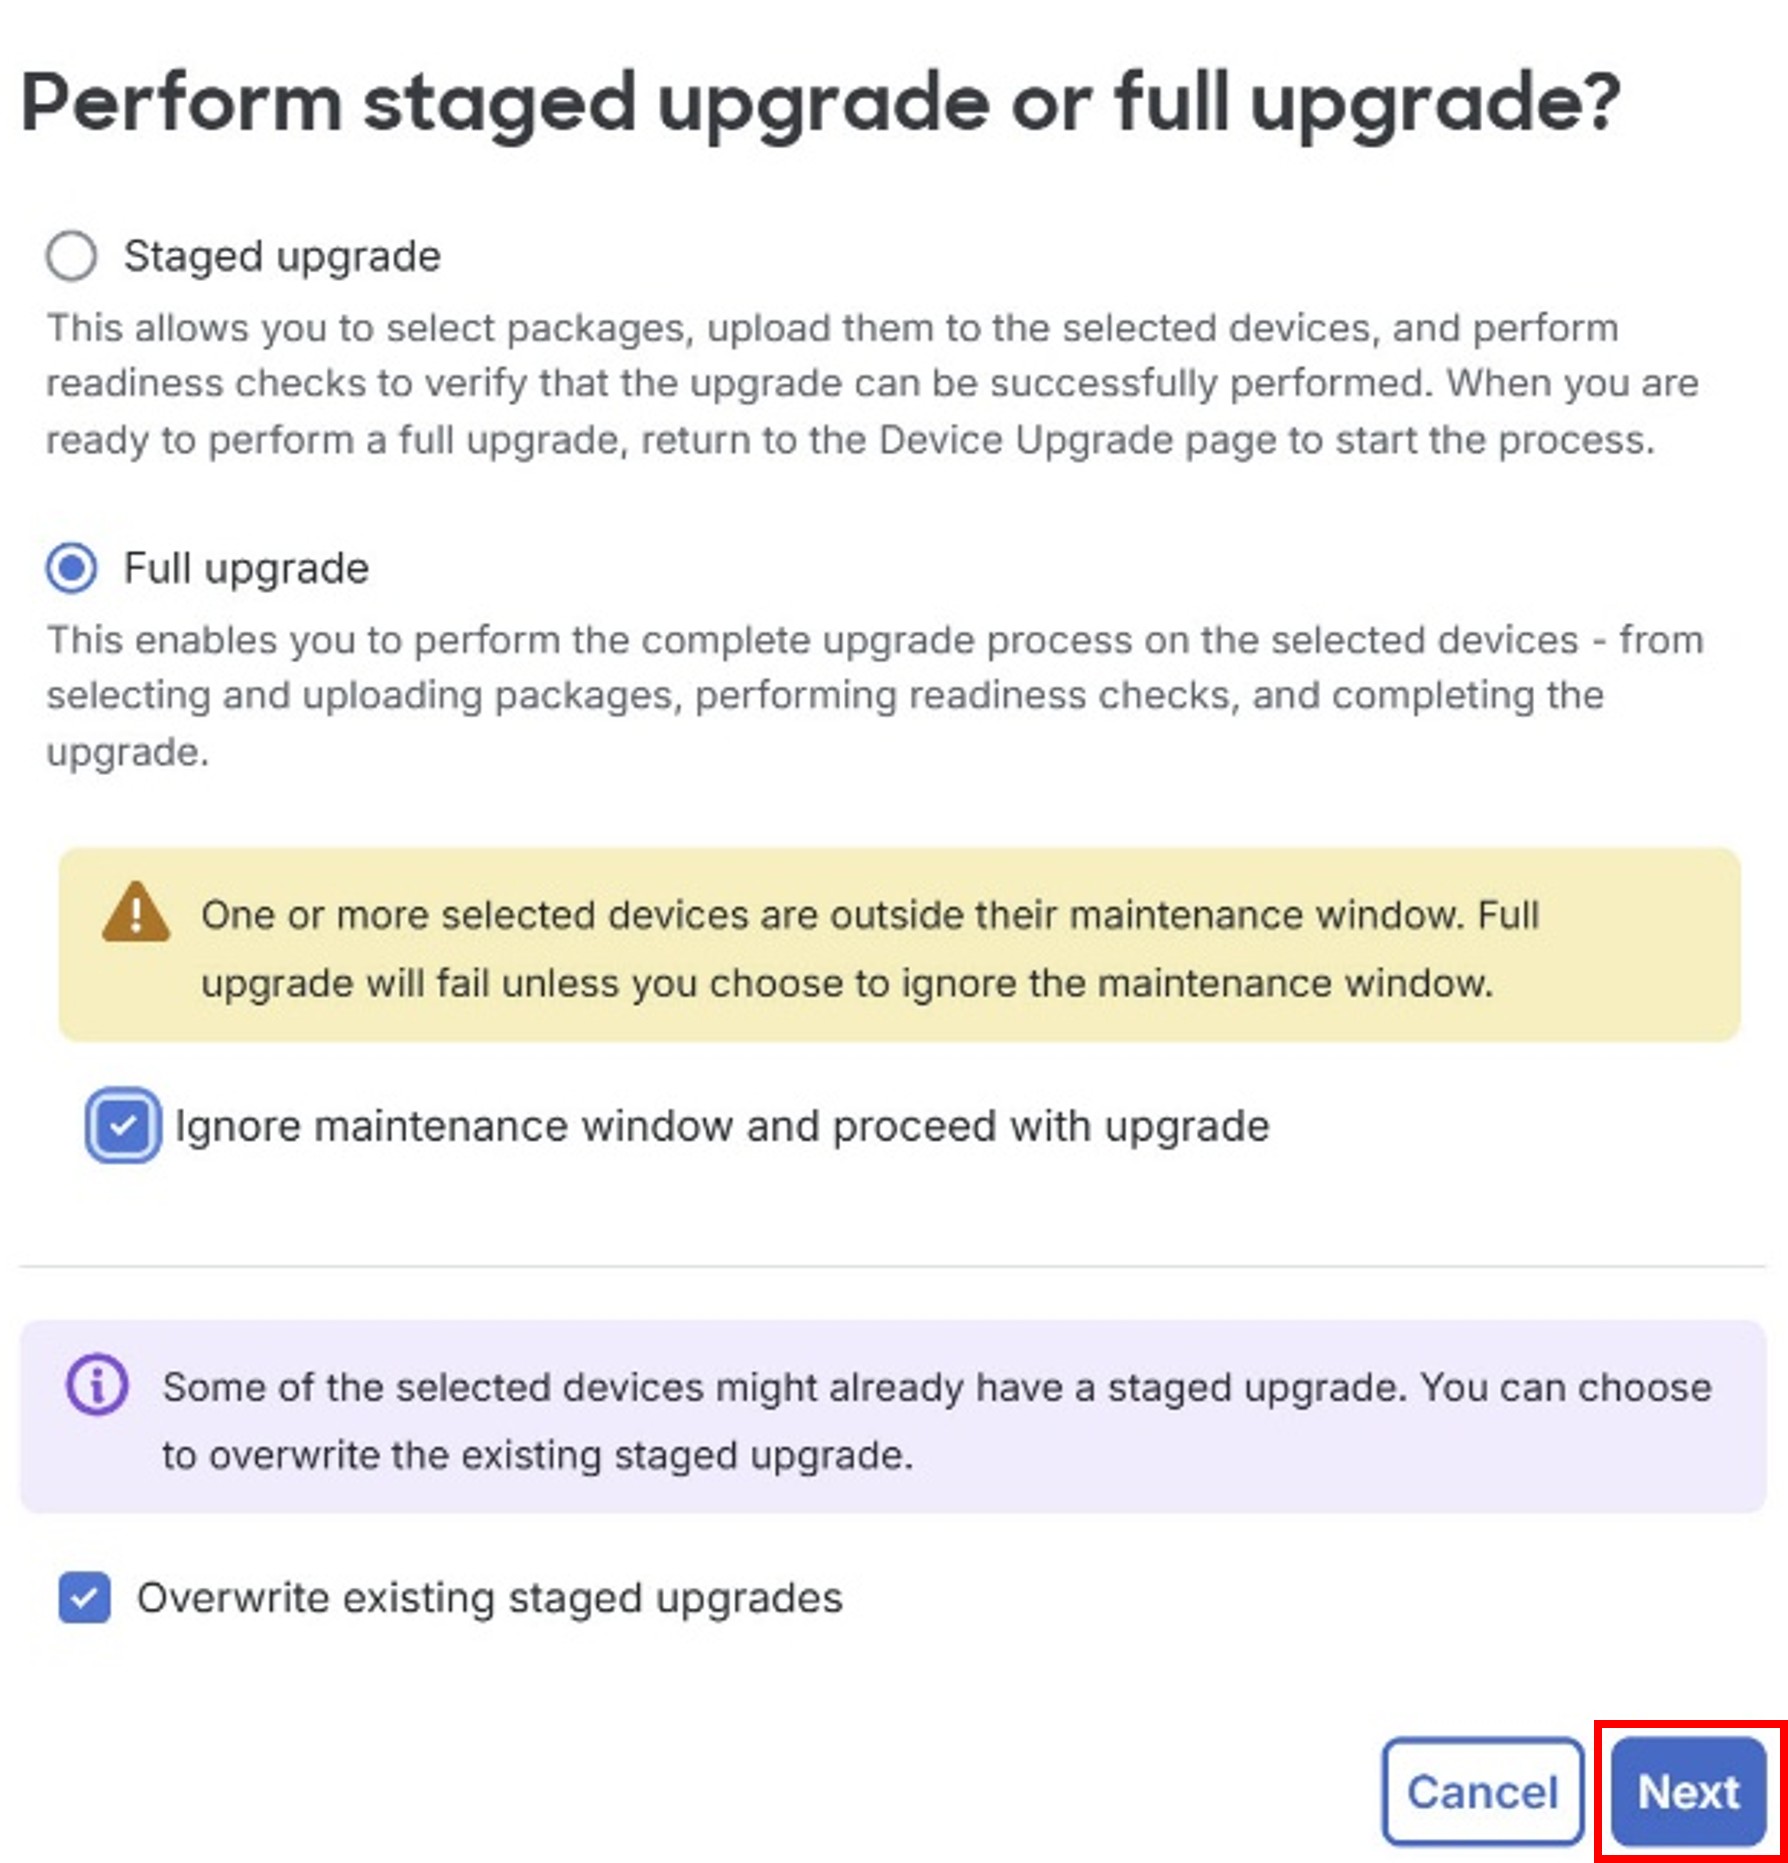
Step 4 | Click the Full upgrade button in the dialog box that is displayed, and then click Next. To perform a full upgrade on devices that are outside their maintenance window, click the Ignore maintenance window and proceed with upgrade check box in the dialog box and then click Next. Performing upgrades outside the maintenance window is not recommended and should only be done in urgent situations. For ASA upgrades, select the Overwrite existing staged upgrades check box to overwrite the existing staged upgrades, if any, for the selected devices.
| ||
Step 5 | For ASA upgrades, select a software version. You can use the search fields to search devices by the software version. Click Select ASDM version. For FTD upgrades, select an upgrade package from the list of Threat Defense packages available for the selected devices and click Perform upgrade. Note that not all the devices are compatible with all the packages. | ||
Step 6 | For ASA upgrades, select the ASDM version to be installed on the selected devices or select the Skip ASDM version upgrade check box to retain the current ASDM version and upgrade only the software version. Note that this step is not required for FTD upgrades. | ||
Step 7 | Click Back to Upgrades to return to the Upgrades page. After the upgrade is complete, the message Upgrade completed appears under the Status column in the Upgrades page. If your upgrade fails, a message stating the reason for the failure is displayed. |